Goodridge Stainless Brake Hose Kits
06 and 60 Series
![]()
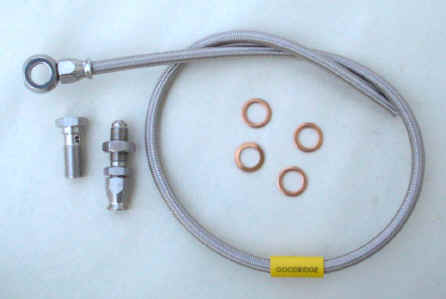
#60-4244/SS |
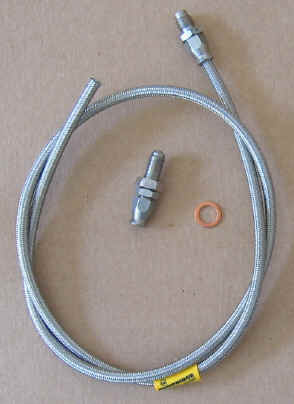
#06-3508/A |
06-3508/A - Norton Commando Front Brake Hose Kit, All Lengths *
06-6218/A - MKIII Commando Rear Brake Hose Kit
06-6236/A - MKIII Commando Front Brake Hose Kit, All Lengths *
and Triumph Low Bar Front Brake Hose Kit, All Lengths *
60-4175/SS - Triumph Bottom Front Brake Hose Kit, All Lengths *
60-4244/SS - Triumph High Bar Top Front Brake Hose Kit, All Lengths *
60-7028/A - Triumph Rear Early Brake Hose Kit, Low Caliper Type
60-7233/SS - Triumph Rear Late Brake Hose Kit, High Caliper Type
(*Note: One end is not attached, so one kit adapts to all lengths for a particular application.)
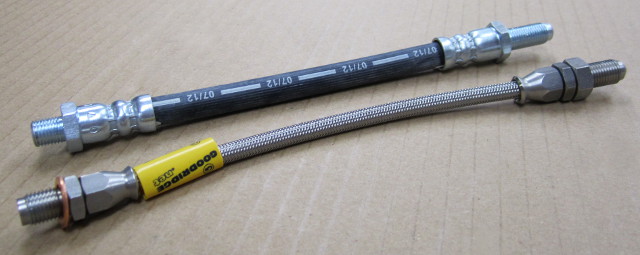
Comparison of #60-7028/A to our regular brake hose |
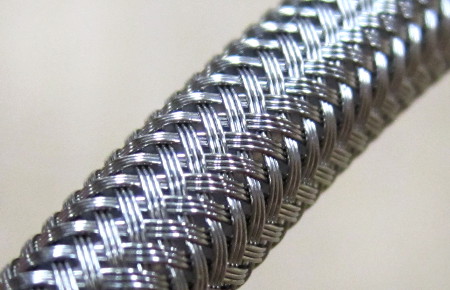
Close-up of stainless steel braiding |
Also available: #06-5561/A Stainless Norton Rocker Feed Kit, complete with three stainless banjo bolts and all copper washers, for all Norton Twins.
INSTRUCTIONS FOR CUTTING HOSE TO LENGTH
Step One

Wrap hose with masking tape at cut-off point
and cut squarely to length through taped area using a sharp cut-off wheel or a
fine toothed hacksaw. Remove tape and trim any loose wires flush with tube
stock. Any burrs on the bore of the tube should be removed with a knife. Clean
the hose bore. Sometimes wire braid will tend to "neck down" on one end and
"flare out" on the opposite end. This is characteristic of wire braid and can be
used to an advantage in the assembly process.
Slip two sockets back to back over
the "necked down" end of the hose, positioned approximately three Inches from
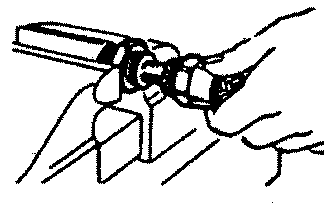
each end. Mount nipple hex in a vice. Work hose bore over the nipple to size the
tube and aid in separating the braid prior to fitting the olive. Remove hose
from nipple.
Step Two
Push the olive over the end of the inner tube and under the wire by hand. Complete positioning of the sleeve by pushing the hose end against a flat surface. Visually inspect to see that tube stock butts against the inside shoulder of the olive.
Step Three
Lubricate the fitting nipple and socket
thread, hold the nipple with the hex in the vice. Push the hose over the nipple
with a twisting motion until seated against the nipple chamfer. Push the socket
forward and hand start threading the socket onto the fitting.
Step Four
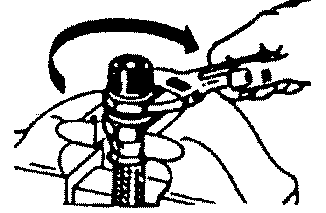
Wrench tighten the socket until there is a clearance of 1/32" or less between the socket and the hex of the
fitting.
CLEAN, TEST TO OPERATING PRESSURE AND INSPECT ASSEMBLY.
*SOCKETS MUST NOT BE TURNED ANTI-CLOCKWISE ONCE ASSEMBLY IS IN USE.